Sunday, December 31, 2006

homegrown glasswork


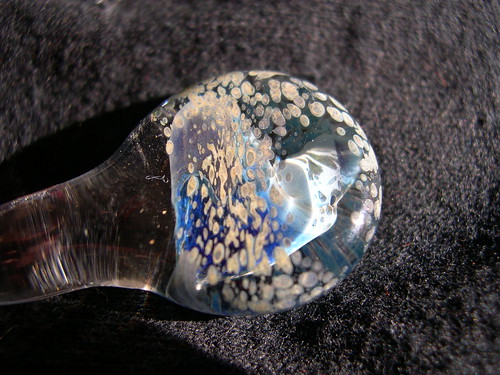
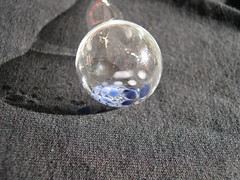
My dad and I did some playing with glasswork this Christmas. We used his welding torch with a rosebud tip (multiple flame holes) and propane/oxygen flame. We used clear glass tubing and rod to which we added colored glass from rod and frit (ground up colored glass pieces of varying size). Our shapes were far from symmetrical but the process was pretty fun anyway. The glass turns to a honey like material when hot. Our flame wasnt hot enough to heat much more mass of glass so our projects were limited to small items like blown glass bulbs and icicle like items.


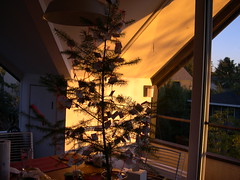
This is my dad's garage and our glasswork set up.

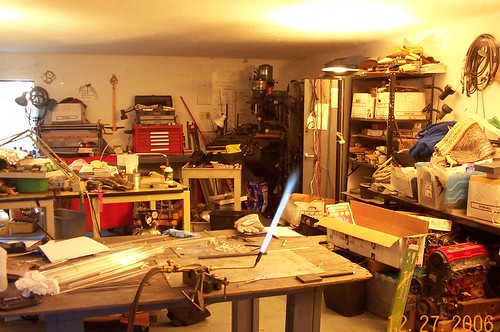
notice the mill and silvertop toyota engine in the background! Not pictured are the band saw, metal lathe and MIG welder. Ahhh tools...

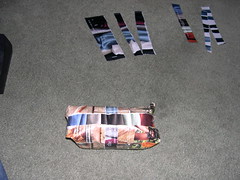
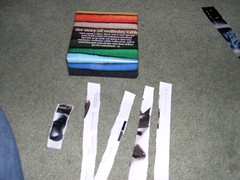
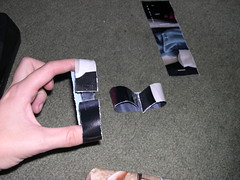
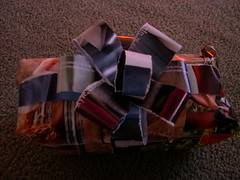
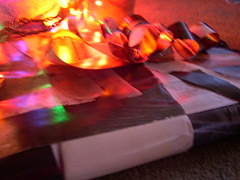
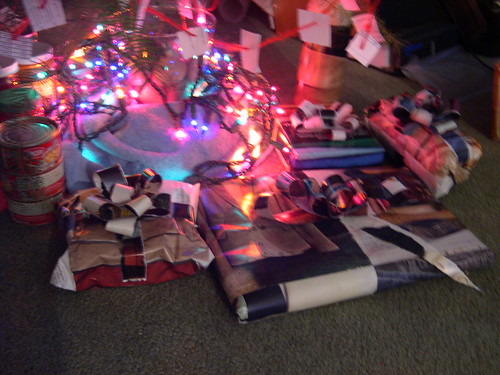
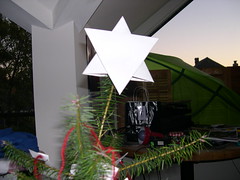
A few more of our creations

Wednesday, December 27, 2006

Winter Welding (and other projects)


My dad and I have been busy around the house (and especially the garage). I did a little work on my welded shoe rack doing final welds on the non-corner joints and grinding all the welds down (my welding is less than perfect). The next step is to weld on tabs to hold the shelves up and then make the shelves. Alas that will be left for yet another day.

We also had some fun with the welding torch and some glass rod and tubing. more on that when i can take some acceptable photos. All i have to say is molten glass is pretty neat stuff.

After the earthquake my parents had last August (only a 4.4 but they were less than 3 miles from the epicenter) it became clear that some earthquake-proofing was going to be necessary. I managed to putty down a shelf of antique glass bottles which were just waiting to go flying and I convinced my dad to strap a few pieces of furniture to the walls. The cabinets still need latching but it was a good start.

I had asked my dad for a subscription to Craft for xmas and the story of him acquiring one involves him visiting the actual OReilly headquarters only to find multiple confused people who informed him that he could just order a subscription online. The fact that my dad, the engineer, could probably build a computer but is incapable (or really just uncomfortable) navigating the internet is totally hilarious. Somehow Make volume 8 came out of the deal though and I imagine that he made a few peoples day over at OReilly.

Finally, over at Curbly I was selected as a finalist for the Curbly Christmas wishlist and if I win I get $200 of rad crafting books from Amazon. They are deciding the winner by votes in the comments so if you feel like heading over there drop a vote in for "List to start a craft library by" (thats me!). (You will need a curbly account but its free) I asked for some good stuff like Denyse Schmidt's quilting book, Jenny Hart's embroidery book and all four of the Barbara Walker stitch dictionaries.

Tuesday, December 19, 2006

Recycled Wrapping


Im no Martha Stewart (that is for sure) but I do love a beautifully wrapped package. I just cant ever bring myself to buy (or afford) wrapping materials which are just discarded (by some people) after the gift is open. I also have yet to acquire (and would have nowhere to store) the large box of wrapping paper and ribbon saved up over many years like my mom has. My solution is to wrap everything in paper that was already destined to be thrown out.

This is how I wrap gifts in recycled (or reused?) catalogs. Forgive the fuzzy photos, I was trying to avoid the flash.

Find a catalog to pillage for the cause. Look for catalogs with full page photos and nice colors. The subject of the photo really isnt important as just the act of using it for wrapping a package will abstract whatever the original photo is. I find that jcrew catalogs work well and have a large variety of colors represented. They also have entire pages devoted to the ever mesmerizing stacks of shirts (or sweaters, pants etc) in a rainbow of colors. Outdoor wear catalogs like patagonia will also have great photos but I cant quite bear myself to tear them up. In any case find one in your recycling bin or around the house and get started! You will also need tape, some string of some sort and possibly some scissors.


Depending on how large your items are you may wish to use single pages or double pages. If you want double pages I recommend removing the staples from the cat log before beginning. If you just want single pages you can tear them out pretty easily. Choose the best pages to start with. I like the full page color photos of stacks of clothing or people in scenes.


Boxes are super easy to wrap this way but soft items can be done well too. Things that can be rolled like tshirts or pants are very easy to wrap.

For this example I will wrap a shirt. Use tape wherever necessary.
1. Make a background paper large enough for the item. If need be tape more pages on in whatever direction to make a sheet large enough. For this shirt I will just use one double sheet.


2. Wrap the item. Wrap round things in a tube shape first

Then close the ends either by tootsie roll-like twist and some string or by a circular end fold. I may decide to describe this further later but it basically just involves bringing the paper towards the center of the circle from many points around the edge in a pleated fashion. It looks a bit like this but can be done much more neatly!

Here is my wrapped shirt


3. Make ribbons and bows for decorations. Ribbons or bows of some kind may be necessary for this type of wrapping to obscure large areas of text. Regular ribbons and bows work great with catalog wrapping too but making your own is quick and fun. Faux ribbon can be made from contrasting colored catalog pages and bows can be either matching or contrasting. The catalog pages will rip easily along the grain which is usually aligned with the text.


Ribbons can be any style you like but I often go for the standard cross down the middle.


Bows can be made in many styles (and out of any type of paper!). To make a circular bow start with four equal length strips. For simplicity i use strips torn from a single sheet (so their length is the width of the paper). You will also need one strip 1/3 to 1/2 the length of the others.

Make the strips into squashed loops. This can be done with one piece of tape by leaving a gap between the ends of the strip with the sticky side towards the middle of the loop. Make the short piece of paper into a non-squashed loop for the center of the bow.

Once you have four loops assemble them into a bow using rolled bits of tape (so its sticky on both sides). I usually put down two loops perpendicular to one another and then another set of two more at 45 degrees from the first. The small loop goes in the center. You can assemble the bow on its own and then affix it to the package or just affix it as you assemble. This all sounds more complicated than it actually is.

You can also make oblong bows by varying the length of the loops or tiered circular bows by making an outer tier of larger loops for the bow above.

Feel free to add "ribbon" tails to your bow as well.

4. Make a gift tag

Lots of catalog pages will have solid patches which can be used for writing gift tags. They dont need to be white so long as your pen will show on the color. You can also write directly on the wrapping paper as it is unlikely to be used again later (although I find that people often save the bows since they are unusual looking). I also like to cut gift tags into the shape of the name of the gift recipient. This is not so easy for friends with long names but great for mom and dad. (Ill try to add a photo later, I think the camera has wandered off for holiday)

General tips:
Dont be afraid to try this! The worst case is that you will use up a little tape and re-arrange your recycling.
Dont worry about making it *too* neat. Im a fan of tightly wrapped packages and that is entirely possible with this approach (especially with small boxes) but dont worry too much about making perfectly even bows. They have a handmade look and a lot of character not being "perfect." The same goes for gift tags and ribbon.
Enjoy torn edges. I didnt even pick up the scissors except to cut the gift tag and I could have done without them.
This method is non-holiday specific so it works great all year. Better yet you dont need to specially buy paper for different occasions.

Let me know if you have any questions I havent addressed and Id love to see how it goes for you!

Monday, December 18, 2006

California Style Christmas


How to have a California style Holiday Season:
1. Combine all aspects of Holiday season into one big-ole celebration. I like to put a star of David on top of my Chirstmas Tree (or Holiday Bush etc). I also enjoy jewish themed ornaments. Im not religious at all so I just like to celebrate Christmas in the true American fashion of consumerism, feasts and family visits.


2. Use recycled materials for as many things as possible. And I dont mean wrapping paper made from recycled material (though that is a step in the right direction) I mean use things that have already served another purpose. I like to wrap presents in jcrew catalogs. I get far too many in the mail and the shiny colorfull glossy paper makes great wrapping material. Make your own bows and "ribbon" too! Ill post a bit more about that later.
I also made a garland this year out of already used printer paper and some red yarn. I think it would look nice and do a good job reflecting the colored lights if my tree were strong enough to support them!


3. Get your holiday tree(s) and foliage from a sustainable source. Mine came from my parents yard where the Douglass Fir trees are taking over. My dad is scrambling to keep their numbers under control so I would classify that as than sustainable. The Berkeley Forestry Club also sells trees on campus which they harvest from the research forest in the Sierras.

4. Make gifts yourself. I know not everyone has the time for this and it isnt appropriate for every situation but I really enjoy the process. I enjoy giving gifts to people that I have spent time thinking about and working on.


5. Enjoy the sun and spend some time outside just because you can!

Friday, November 24, 2006

a beast of a sweater


Many months ago Carmen scored a lot of superbulky yarn from the ebay branch of Handpaintedyarn.com/Malabrigo right as the website stopped carrying it (and the price was subsequently raised from $5 to $12). The yarn is really nice and Ive made several hats out of it (pattern for cabled hat). I decided to make a raglan cardigan but I wasnt sure 10 skeins was going to be enough. I have knit and re-knit most parts of this sweater several times because I apparently have no ability to plan out a project ahead of time and I keep changing my mind. I just decided I wanted pockets, but not patch pockets since I wont have much extra yarn, so I ripped out the whole body back to the top of the pockets. Its pretty quick knitting and this is the sort of sweater that should have been done in about a weekend but my indecision has drawn it out for months. It also weighs a ton. All I have to say is thank goodness for interchangeable needles!

Tuesday, November 21, 2006

nasturtiums


I made this skirt in middle school from some fabric my mom had lying around. Needless to say it no longer fits me but I love the fabric so much that I need to find some appropriate use for it. I was thinking about piecing it together with some plain colored fabric to make the top of a blanket but im not sure how much I like that idea. Anyone have a good suggestion of what I should make?

Sunday, November 19, 2006

pork chop!


I bought this stuffed pork chop from Sweet Meats at the craft mafia trunk show in SF this last weekend. It even came all wrapped in butcher paper with a deli sticker. So cute! I think apollo likes it too...


this weekend really did have too much shopping involved. I may or may not have the energy to talk about it (yes it really was that exhausting) except to say it involved BOTH the Mountain Hardware wharehouse AND the Patagonia outlet and that some items were cheap enough that I had to buy them and Ive already started pawning jackets off on other people... (I have two more - anyone my size?)

Thursday, November 16, 2006

Avocados grow on trees! and other news from Hawaii


lava!, originally uploaded by abmatic.

At last! i have uploaded photos from my Hawaii trip. You can see the full set of photos (ok, actually I tried to pare it down as much as i could) here, a condensed set here and a few favorites are below. We saw lava flowing into the sea, white, black and green (olivine!) beaches and sea turtles. We ate grass fed Hawaiian beef, tropical fruits and shave ice with fresh coconut and drank large quantities of kona coffee. The first day we had lunch with Phoebe in Waikiki and the next three days we stayed with Ingrid who was visiting at HVO in Volcano National Park. Then we spent two days sitting on the beach and two days sitting around on our porch looking out over the ocean. It was warm and wonderful and in strong contrast to the 30knt winds and 40 degree temps in chicago right now (where i am sitting in the airport-- almost home!) and thats not even cold for Chicago...

anyway on to the photos

Green Sand Beach
Green Sand Beach

Punaluu as a storm was coming in. This beach was 100% shattered basalt and entirely black.
Nick

Sea Turtles! There were a bunch of them hanging out at Punaluu
Sea Turtle

Punaluu
Punaluu


Waipio Valley
waipio valley

Sunset from the porch
view from the porch

Monday, October 30, 2006

Make your own Cardboard Spurs

So I was invited to a halloween party this past weekend with a western theme (is a theme even allowed at halloween?) for which I had little to work with in the way of costume items. What is a girl to do? Make her own cardboard accessories obviously! This set of photos on Flickr explains how you can make your own pair of cardboard spurs so you can be ready for whatever halloween throws at you. There isnt much complicated about it but you will need some way to cut cardboard, a tapestry needle and some yarn or string.

I would love to say that the spurs won "best use of cardboard" at the party but it's hard when your up against someone dressed as an outhouse....

Sunday, October 22, 2006

Jeans, resurrected


DSCN2508.JPG, originally uploaded by abmatic.

I get very attached to my jeans but there comes a time when wearing them out of the house is a dangerous enterprise (for the jeans). Since I dont want my beloved pants to actually die I have been stratigically re-inforcing all the weak points I can find to prevent tears and gaping holes from forming. I have two pairs I have been working to save and so far its been pretty sucessfull. Above you can see the patches I've added to pair #1. They are right-side out below.
DSCN2512.JPG

There are 4 main weak points that seem to deveolp in all my pairs.
1. Left side pocket area develops a hole in the corner from my cell phone
2. Back center belt loop is badly worn and sometimes tears all the way off. It must chafe on something, maybe my backpack. Have you ever tried to wear pants with a belt when the back belt loop is missing? It's rather disastrous if you actually need the belt.
3. Right hand pocket area sometimes develops hole from my chapstick
4. Knee area cloth wears thin and tears

weak point 2 with repair:
DSCN2536.JPG

weak point 4 with repair:
DSCN2538.JPG

I have broken down and bouthgt a new pair but I love the old ones so much that I'm determined to keep them going.... at least for now.

Thursday, October 19, 2006

Homeade Belt


DSCN2507.JPG, originally uploaded by abmatic.

On a trip this summer a friend of mine had some problems with descending pants and was dreadfully in need of a belt. I dont want to name names here but since the lady in question is vegan i thought a homeade belt would be a good solution (no leather involved). I dont think she reads this page (does anyone?) but i do risk ruining the surprise.

Its been done before and it is in no way ingenious but here Ive gone and done it again. The belt is plain canvas on one side and printed fabrics on the other. I used a variety of scraps to get the full length and put colored fabrics on both sides at the end where the belt folds back after the buckle. If i did it again i might consider using some iron on adhesive to add more stiffness and keep the layers tidy during sewing. Other than that it was quite simple to do, its quick and I like the finished result very much.

Now I only need to get over my procrastination of going to the post office....


From the side:
DSCN2503.JPG

Several people have commented on the cat appearing in lots of photos. In realitiy its far more difficult to frame a photo in my apartment without the cat in it. What can I say, he is a total ham.

Stage 1: Apollo comes in to investigate what is so captivating to me
DSCN2496.JPG

Stage 2: where Apollo usually sits on top of the item of interest
DSCN2497.JPG

Stage 3: he usually begins rolling in, clawing or trying to play with the item as in the photos of the Clapotis
DSCN2474.JPG