Recycled Wrapping
Im no Martha Stewart (that is for sure) but I do love a beautifully wrapped package. I just cant ever bring myself to buy (or afford) wrapping materials which are just discarded (by some people) after the gift is open. I also have yet to acquire (and would have nowhere to store) the large box of wrapping paper and ribbon saved up over many years like my mom has. My solution is to wrap everything in paper that was already destined to be thrown out.
This is how I wrap gifts in recycled (or reused?) catalogs. Forgive the fuzzy photos, I was trying to avoid the flash.
Find a catalog to pillage for the cause. Look for catalogs with full page photos and nice colors. The subject of the photo really isnt important as just the act of using it for wrapping a package will abstract whatever the original photo is. I find that jcrew catalogs work well and have a large variety of colors represented. They also have entire pages devoted to the ever mesmerizing stacks of shirts (or sweaters, pants etc) in a rainbow of colors. Outdoor wear catalogs like patagonia will also have great photos but I cant quite bear myself to tear them up. In any case find one in your recycling bin or around the house and get started! You will also need tape, some string of some sort and possibly some scissors.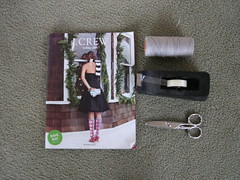
Depending on how large your items are you may wish to use single pages or double pages. If you want double pages I recommend removing the staples from the cat log before beginning. If you just want single pages you can tear them out pretty easily. Choose the best pages to start with. I like the full page color photos of stacks of clothing or people in scenes.
Boxes are super easy to wrap this way but soft items can be done well too. Things that can be rolled like tshirts or pants are very easy to wrap.
For this example I will wrap a shirt. Use tape wherever necessary.
1. Make a background paper large enough for the item. If need be tape more pages on in whatever direction to make a sheet large enough. For this shirt I will just use one double sheet.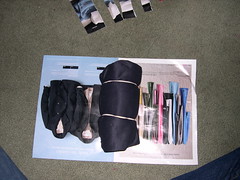
2. Wrap the item. Wrap round things in a tube shape first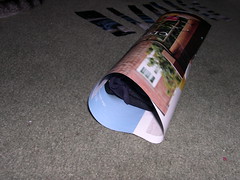
Then close the ends either by tootsie roll-like twist and some string or by a circular end fold. I may decide to describe this further later but it basically just involves bringing the paper towards the center of the circle from many points around the edge in a pleated fashion. It looks a bit like this but can be done much more neatly!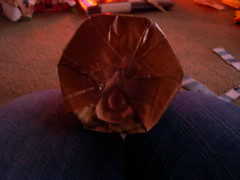
Here is my wrapped shirt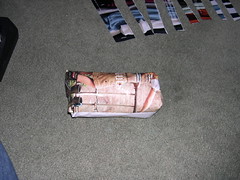
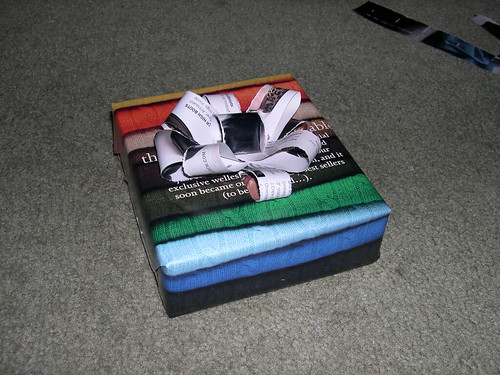
3. Make ribbons and bows for decorations. Ribbons or bows of some kind may be necessary for this type of wrapping to obscure large areas of text. Regular ribbons and bows work great with catalog wrapping too but making your own is quick and fun. Faux ribbon can be made from contrasting colored catalog pages and bows can be either matching or contrasting. The catalog pages will rip easily along the grain which is usually aligned with the text.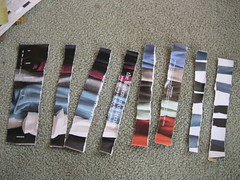
Ribbons can be any style you like but I often go for the standard cross down the middle.
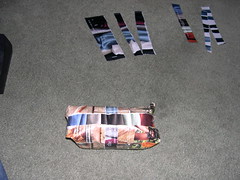
Bows can be made in many styles (and out of any type of paper!). To make a circular bow start with four equal length strips. For simplicity i use strips torn from a single sheet (so their length is the width of the paper). You will also need one strip 1/3 to 1/2 the length of the others.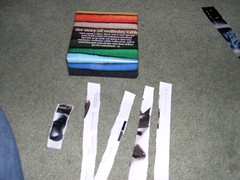
Make the strips into squashed loops. This can be done with one piece of tape by leaving a gap between the ends of the strip with the sticky side towards the middle of the loop. Make the short piece of paper into a non-squashed loop for the center of the bow.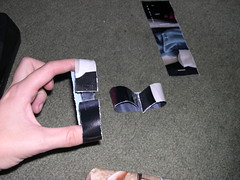
Once you have four loops assemble them into a bow using rolled bits of tape (so its sticky on both sides). I usually put down two loops perpendicular to one another and then another set of two more at 45 degrees from the first. The small loop goes in the center. You can assemble the bow on its own and then affix it to the package or just affix it as you assemble. This all sounds more complicated than it actually is.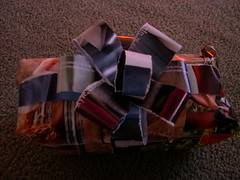
You can also make oblong bows by varying the length of the loops or tiered circular bows by making an outer tier of larger loops for the bow above.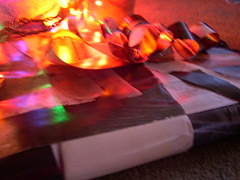
Feel free to add "ribbon" tails to your bow as well.
4. Make a gift tag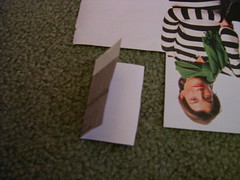
Lots of catalog pages will have solid patches which can be used for writing gift tags. They dont need to be white so long as your pen will show on the color. You can also write directly on the wrapping paper as it is unlikely to be used again later (although I find that people often save the bows since they are unusual looking). I also like to cut gift tags into the shape of the name of the gift recipient. This is not so easy for friends with long names but great for mom and dad. (Ill try to add a photo later, I think the camera has wandered off for holiday)
General tips:
Dont be afraid to try this! The worst case is that you will use up a little tape and re-arrange your recycling.
Dont worry about making it *too* neat. Im a fan of tightly wrapped packages and that is entirely possible with this approach (especially with small boxes) but dont worry too much about making perfectly even bows. They have a handmade look and a lot of character not being "perfect." The same goes for gift tags and ribbon.
Enjoy torn edges. I didnt even pick up the scissors except to cut the gift tag and I could have done without them.
This method is non-holiday specific so it works great all year. Better yet you dont need to specially buy paper for different occasions.
Let me know if you have any questions I havent addressed and Id love to see how it goes for you!
![]()


1 comment:
abby! i am simply amazed by your craftiness, but more than that, that you make TIME for it all! i barely have time to read your blog on a regular basis!! but it makes it more fun when i do actually get around to it. keep up the good work. :)
miss you!
miriam
ps. i love your hawaii photos
Post a Comment